
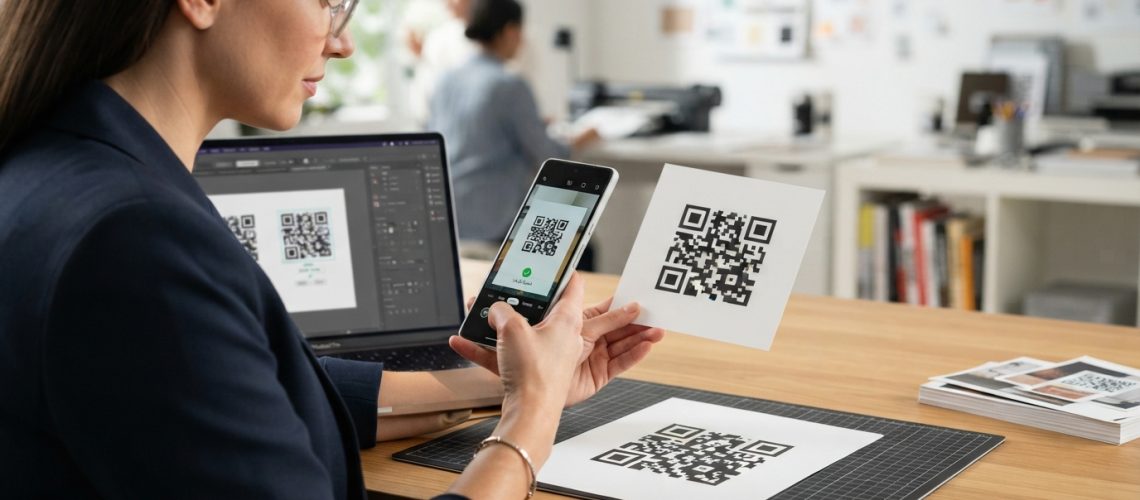
A printed QR code that fails to scan is a silent conversion killer. Whether it is plastered on a billboard, printed on thousands of product packages, or distributed on event flyers, a broken QR code wastes marketing budget, damages brand credibility, and frustrates users. To ensure seamless scannability, you must understand the technical intersections of graphic design, printing physics, and optical recognition software. By implementing professional preparation standards, utilizing high-quality vector assets from a reliable QR Code Generator, and optimizing your print settings, you can completely eliminate scan errors before your designs ever hit the printing press.
The Physics of a Scan: Why Printed QR Codes Fail
To prevent printing errors, we must first understand how a smartphone camera reads a Quick Response (QR) code. Smartphone cameras do not see images the way humans do; they analyze contrast, geometry, and spatial frequencies. A standard QR code consists of several critical components:
- Finder Patterns (Position Detection Markers): The three large squares in the corners that tell the camera app where the boundaries of the code are and its orientation.
- Alignment Patterns: Smaller squares used in larger QR codes (Version 2 and above) to correct for physical distortion or curved surfaces.
- Timing Patterns: Alternating black and white pixels that help the scanner determine the size of the data matrix grid.
- Quiet Zone: The solid, uninterrupted border surrounding the QR code that separates it from surrounding graphics and text.
When a printed QR code fails to scan, it is almost always due to a failure in one of these structural areas. The camera’s sensor fails to distinguish the dark modules from the light background, gets confused by surrounding visual noise, or cannot resolve the individual pixels due to low resolution or ink bleed (dot gain).
The Core Pillars of Error-Free QR Code Printing
Achieving a 100% scan success rate requires adherence to four core principles: resolution integrity, color contrast, sizing math, and quiet zone preservation. Let us analyze each of these pillars in detail.
1. Resolution and File Formats: Say No to Rasterization
The single most common mistake in print design is using raster image formats (such as JPEG or PNG) for print layouts. Raster images are made of pixels. When scaled up, they become blurry, pixelated, and lose their sharp edges. This soft-edge blur confuses the edge-detection algorithms of smartphone cameras.
For professional printing, you must use vector formats (such as SVG, EPS, or PDF). Vector graphics are mathematically defined shapes that remain infinitely sharp at any size. When exporting your files from a professional platform, always download the vector version of your QR code.
If you must use a raster format (for example, in a legacy layout tool), ensure the image resolution is at least 300 DPI (Dots Per Inch) at the exact physical size it will be printed. A 72 DPI image pulled from a website will look jagged and fail to scan when printed on paper.
2. The Golden Ratio of Sizing: The 10:1 Rule
How small can a QR code be? The answer depends entirely on the distance from which the user will scan it. If a QR code is printed too small, the smartphone camera cannot resolve the individual data modules, resulting in a failed scan.
The industry standard for calculating the correct size of a QR code is the 10:1 scanning ratio rule. The scanning distance divided by 10 determines the minimum width of the printed QR code.
| Intended Scanning Distance | Minimum QR Code Size (Width x Height) | Common Use Case |
|---|---|---|
| 10 centimeters (4 inches) | 1.0 cm x 1.0 cm (0.4″ x 0.4″) | Business cards, product labels |
| 30 centimeters (1 foot) | 3.0 cm x 3.0 cm (1.2″ x 1.2″) | Flyers, brochures, table tents |
| 1 meter (3.3 feet) | 10.0 cm x 10.0 cm (4.0″ x 4.0″) | In-store posters, window displays |
| 5 meters (16.4 feet) | 50.0 cm x 50.0 cm (20.0″ x 20.0″) | Outdoor banners, transit shelters |
Absolute Minimum Size: Regardless of the formula, never print a QR code smaller than 2.0 cm x 2.0 cm (0.8 inches x 0.8 inches). While modern high-end smartphones can occasionally scan smaller codes in perfect lighting, older devices with lower-resolution cameras will fail consistently.
3. Color Theory and Contrast Ratios
QR code scanners rely on high contrast to distinguish between the background (light modules) and the foreground (dark modules). The optimal combination is a solid black QR code on a solid white background. However, modern branding often requires custom colors. When customizing your QR codes, follow these strict color rules:
- Keep the Foreground Dark: The data modules must always be significantly darker than the background. Scanners are built to detect dark marks on a light background.
- Never Invert Colors: Avoid “inverted” QR codes (white code on a black background). While some advanced scanner apps can read them, many native smartphone camera apps cannot recognize inverted codes.
- Maintain a 4:1 Contrast Ratio: Use a color contrast analyzer to ensure there is a stark difference between your foreground and background colors. Avoid pastel-on-pastel or yellow-on-white designs.
- Avoid Gradients: Multi-color gradients across the QR code can disrupt the camera’s exposure settings, causing specific parts of the code to become unreadable under certain lighting conditions.
4. Respecting the Quiet Zone
The “Quiet Zone” is the blank border that surrounds the outer edges of the QR code. It tells the scanner where the code begins and ends, preventing it from reading surrounding text, logos, or background patterns as part of the data matrix.
The quiet zone must be at least 4 modules wide (a module is a single square within the QR code). If you are using a highly complex QR code with a lot of data, increase the quiet zone to 6 or 8 modules. Do not let text, borders, images, or page folds bleed into this zone.
Understanding Reed-Solomon Error Correction Levels
One of the most powerful features of QR codes is their built-in error correction system, which uses the Reed-Solomon mathematical algorithm. This system allows the QR code to be scanned successfully even if it is partially damaged, dirty, or covered by a logo.
There are four distinct error correction levels, each offering a different trade-off between damage tolerance and data density:
- Level L (Low): Can recover up to 7% of lost or damaged data. This level creates the simplest, least dense QR code, making it ideal for clean, high-resolution prints on flat surfaces.
- Level M (Medium): Can recover up to 15% of lost data. This is the standard setting for most commercial prints, offering a great balance between visual simplicity and scanning reliability.
- Level Q (Quartile): Can recover up to 25% of lost data. Recommended for industrial environments, packaging, or outdoor signage where the code may suffer from scratches or weathering.
- Level H (High): Can recover up to 30% of lost data. This is the mandatory setting if you plan to embed a custom logo or image in the center of your QR code, as the logo itself acts as “damage” to the code’s native structure.
Pro Tip: Higher error correction levels make the QR code grid more dense (containing more squares). If you are printing a very small QR code, a higher error correction level might actually make it harder to scan because the individual squares become too small for the camera to resolve. Always balance your data density with your physical print size.
Choosing the Right Printing Materials and Finishes
The material (substrate) you print your QR code on can drastically affect its optical performance. Even a perfectly designed vector QR code can fail if printed on a highly reflective or heavily textured surface.
The Danger of Glossy Finishes and Glare
Highly reflective surfaces—such as glossy paper, UV-coated cardstock, plastic packaging, glass, or metal—create specular reflection (glare) under direct light. This glare washes out the contrast of the QR code, rendering it invisible to camera sensors. To combat this:
- Specify a matte finish or satin finish for your print materials.
- If printing on glossy packaging is unavoidable, place the QR code on a flat surface away from curved edges, and ensure the background of the code is printed with a highly opaque, non-reflective white ink.
Textured Materials and Ink Bleed
Porous materials like recycled paper, kraft paper, corrugated cardboard, or canvas can cause ink to spread outward as it dries. This phenomenon, known as **dot gain**, shrinks the white spaces inside your QR code and expands the dark blocks, causing the code to blur together. When printing on highly absorbent materials:
- Use a lower-density QR code (shorten your URL or use a dynamic QR code to keep the data matrix simple).
- Slightly increase the size of your QR code to compensate for dot gain.
- Use a higher error correction level (Level M or Q) to protect against bleeding errors.
A Step-by-Step Print-Ready Checklist for Designers
Before sending your final artwork to a commercial printer, run through this comprehensive checklist to guarantee error-free scanning:
- Verify the Destination Link: Ensure the URL is fully functional, secure (HTTPS), and active. Use dynamic QR codes so you can change the target URL later if needed.
- Convert to Vector: Confirm the QR code is in an SVG, EPS, or PDF format inside your design software (such as Adobe Illustrator or InDesign).
- Check the Color Space: Convert your design file to CMYK color mode for physical printing. RGB files can shift dramatically in color when printed, reducing vital contrast.
- Verify Contrast: Ensure the background is solid and light, and the foreground is solid and dark.
- Measure the Quiet Zone: Confirm there is a clear, unprinted margin of at least 4 modules all the way around the QR code.
- Calculate Scan Distance: Double-check that the physical size of the printed QR code matches the 10:1 scanning ratio rule for its environment.
- Perform a Physical Test: Print a draft of your design on a standard office printer at 100% scale. Test it with multiple smartphone models (both iOS and Android) under different lighting conditions.
Real-World Troubleshooting: Solutions to Common Print Failures
Here are the actual issues print production teams face in the field, along with direct solutions to fix them:
“My QR code scans on my screen but not when printed on paper.”
This is usually caused by a drop in contrast during the transition from the RGB digital color space (which emits light) to the CMYK print color space (which absorbs light). Dark blues or grays that look distinct on a backlit monitor can print much darker, blending into the background. Always check your print proofs in CMYK mode and boost contrast if necessary.
“The QR code is printed on a curved bottle and won’t scan.”
When a QR code is wrapped around a cylindrical object like a bottle, can, or tube, the camera’s lens experiences geometric distortion. The vertical lines of the code warp around the curve. To fix this, print the QR code vertically aligned so the curve does not distort the horizontal reading plane, or reduce the overall size of the code so it sits on a flatter portion of the packaging.
“The ink is smudging on our packaging lines.”
High-speed packaging lines require fast-drying inks. If the ink smudges, the geometry of the QR code is ruined. Work with your packaging printer to ensure proper curing times, or switch to a thermal transfer printing method which offers exceptionally sharp edges and zero smudge risk for barcodes and QR codes.
Frequently Asked Questions
Can I put a logo in the middle of my printed QR code?
Yes, but you must use Level H (High) error correction. This ensures that even though your logo covers up to 30% of the code’s data modules, the remaining 70% of the code contains enough redundant data to allow a successful scan. Always test the finalized logo-embedded code across multiple devices before printing.
Does the background of a printed QR code have to be white?
No, the background does not have to be white, but it must be light and uniform. Light yellow, pastel cream, or soft silver can work well. Avoid busy patterns, textures, or dark background colors, as they will degrade the contrast required by the scanning software.
What is the difference between static and dynamic QR codes for printing?
Static QR codes hardcode the destination URL directly into the pixel pattern. If the URL is long, the QR code becomes extremely dense and complex, making it harder to print and scan. Dynamic QR codes encode a short, redirect URL instead. This keeps the QR code simple, low-density, and easy to print at small sizes. Furthermore, dynamic QR codes allow you to edit the destination URL at any time without having to reprint your physical materials.
How does paper texture affect QR code readability?
Heavily textured papers (like linen, felt, or handmade cotton paper) break up the solid ink blocks of a QR code, creating microscopic white gaps within the dark modules. This can cause the scanner to misread the pixel grid. If you must use textured paper, print the QR code on a smooth, solid-colored sticker label and apply it to the textured surface, or increase the overall size of the printed code to minimize the impact of the paper texture.