
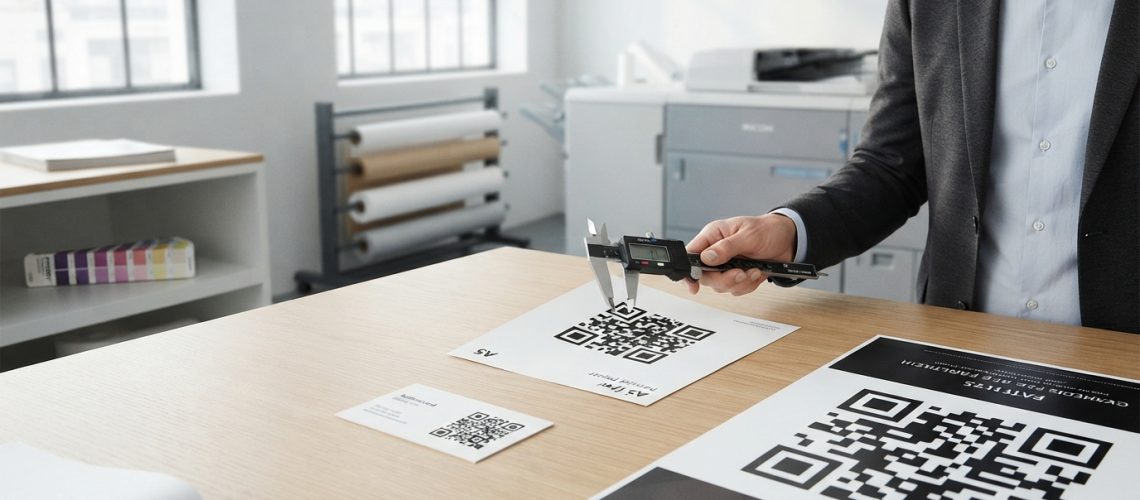
To ensure a printed QR code scans flawlessly every time, the absolute minimum size for a standard QR code is 2 x 2 cm (0.8 x 0.8 inches) for short-range scanning. For optimal reliability, apply the 10:1 scanning ratio rule: the printing size of the QR code should be approximately 10% of the distance between the camera lens and the code itself. For example, if a user scans a flyer from 1 meter (100 cm) away, the QR code must be at least 10 x 10 cm.
The Science of QR Code Scanning: Why Size and Resolution Matter
When a smartphone camera points at a Quick Response (QR) code, it does not just take a picture; its internal software analyzes a matrix of dark and light squares (known as modules or data pixels). The camera’s image sensor must clearly distinguish these modules to decode the embedded binary data. If a QR code is printed too small, the individual modules blur together, rendering the code unscannable.
Several physiological and technical factors dictate whether a camera can read a printed QR code:
- Focal Length and Camera Sensor Resolution: Budget smartphones and older devices have fixed-focus lenses or lower-resolution sensors that struggle with micro-sized graphics.
- Data Density (Version Size): A QR code containing a long, unoptimized URL requires more rows and columns (a higher “version” number), resulting in smaller, more tightly packed modules.
- The Quiet Zone: This is the solid border of blank space surrounding the QR code. Without a proper quiet zone, the scanning software cannot identify where the QR matrix begins and ends.
- Print Substrate and Ink Spread: Paper types absorb ink differently. Uncoated paper or cardboard can cause ink bleed, which expands the dark modules and shrinks the light spaces between them.
When creating your high-resolution assets, using a professional tool like the QR Code Generator ensures your vector files maintain the exact proportions and quiet zones needed for flawless reproduction.
The Golden Formula: Calculating Your QR Code Size
To eliminate guesswork, professional print designers use a simple mathematical formula to calculate the ideal size of a QR code based on the expected scanning distance.
The Formula:
QR Code Size = Scanning Distance / 10
If your target audience is standing at a specific distance from your print media, use this table to determine the minimum and recommended physical dimensions of your QR code:
| Expected Scanning Distance | Minimum QR Code Size | Recommended QR Code Size (for safety) | Common Use Case |
|---|---|---|---|
| 30 cm (11.8 in) | 3.0 x 3.0 cm (1.2 x 1.2 in) | 4.0 x 4.0 cm (1.6 x 1.6 in) | Business cards, product packaging, cosmetic labels | 1 meter (3.3 ft) | 10 x 10 cm (3.9 x 3.9 in) | 12 x 12 cm (4.7 x 4.7 in) | A4 posters, restaurant table tents, retail flyers |
| 3 meters (9.8 ft) | 30 x 30 cm (11.8 x 11.8 in) | 35 x 35 cm (13.8 x 13.8 in) | Window displays, indoor hanging banners, trade show booths |
| 10 meters (32.8 ft) | 100 x 100 cm (39.4 x 39.4 in) | 120 x 120 cm (47.2 x 47.2 in) | Outdoor billboards, highway signage, building wraps |
The Impact of Data Density: Static vs. Dynamic QR Codes
The physical size of your QR code is directly tied to the amount of data encoded within it. Understanding the difference between static and dynamic structures is critical for print design.
Static QR Codes (High Density)
Static QR codes store the destination data directly inside the pattern. If you encode a long URL containing tracking UTM parameters (e.g., https://www.example.com/category/product?utm_source=print&utm_medium=flyer&utm_campaign=summer), the QR code must generate hundreds of tiny modules to house that information. Consequently, a static QR code with high data density must be printed much larger to prevent the modules from blending together during printing.
Dynamic QR Codes (Low Density)
Dynamic QR codes contain a short, redirect URL that points to a server. Because the encoded URL is short and consistent in length, the QR code matrix remains simple, clean, and low-density (typically a Version 2 or Version 3 matrix). Because the modules are larger and fewer in number, dynamic QR codes can be safely printed at much smaller sizes than their static counterparts.
Printing QR Codes by Medium: A Comprehensive Guide
1. Business Cards and Stationery
Space is limited on a standard 3.5 x 2-inch business card. While a 1 x 1 cm QR code might seem aesthetically pleasing, it will fail on many older smartphones. Keep your QR code to a minimum of 2 x 2 cm. Place it in an area with high contrast and avoid placing text or borders too close to its outer edges.
2. Product Packaging and Labels
For small cosmetic jars, food packaging, or medicine bottles, curved surfaces present an extra challenge. If a QR code wraps around a cylindrical container, the camera cannot view the entire matrix simultaneously. Pro Tip: Place the QR code on a flat surface of the packaging, or ensure it is small enough to sit entirely within the camera’s flat field of view without wrapping.
3. Flyers, Brochures, and Magazines
People read magazines and flyers at arm’s length (approximately 30 to 50 cm). A QR code size of 3 x 3 cm is ideal for these mediums. It provides enough surface area for quick scanning without dominating your editorial design layout.
4. Billboards and Large Format Signage
For outdoor advertising, the scanning distance can range from 5 to 50 meters. If a highway billboard is 15 meters away from passing pedestrians, your QR code needs to be at least 1.5 meters (150 cm) wide. Additionally, consider the dwell time: drivers have only a few seconds to scan, so the code must be exceptionally large and high-contrast to register instantly.
The Quiet Zone: The Unsung Hero of QR Code Design
The Quiet Zone is the blank margin that surrounds all four sides of a QR code. It acts as a visual buffer, telling the scanning application where the surrounding design elements end and the data matrix begins.
- Standard Requirement: The quiet zone must be at least 4 times the width of a single module (the small squares making up the QR code).
- Practical Rule: Leave a margin of at least 10% to 15% of the total QR code width as blank space around the code.
- Common Mistake: Running text, background patterns, or borders directly up to the edge of the QR code. This will cause immediate scanning failures on almost all devices.
Color, Contrast, and Design Best Practices
While modern scanners are highly advanced, basic optical rules still apply. To maintain maximum scannability at small sizes, follow these design rules:
- High Contrast is Key: Always use a dark foreground (traditionally black) on a light background (traditionally white). Scanners rely on detecting the difference in light reflectance.
- Avoid Inverted Colors: While some apps can scan a white QR code on a black background, many default camera apps cannot. Stick to dark-on-light configurations.
- Limit Gradient Fills: If you use a gradient, ensure that even the lightest part of the gradient maintains a 4:1 contrast ratio against the background.
- Mind the Logo Placement: If you place a logo in the center of your QR code, do not cover more than 30% of the code. Ensure the logo does not block the three large “finder patterns” (the square targets in the corners).
Choosing the Right File Format for Printing
The format you deliver to your print shop determines whether your QR code remains sharp or turns into a pixelated mess.
Vector Formats (Highly Recommended)
Vector graphics are mathematically calculated shapes that can scale to the size of a skyscraper without losing a single pixel of clarity. Always export your QR codes in one of these formats for professional printing:
- SVG (Scalable Vector Graphics): Best for digital layouts and modern web-to-print software.
- EPS (Encapsulated PostScript): The industry standard for legacy printing presses and professional designers.
- PDF (Portable Document Format): Highly versatile and universally compatible with almost all prepress software.
Raster Formats (Use with Caution)
Raster images are made of a fixed grid of pixels. If you scale them up, they become blurry and pixelated.
- PNG (Portable Network Graphics): Acceptable for small-scale printing (like business cards) only if exported at 300 DPI (Dots Per Inch) or higher at its final physical print size.
- JPG/JPEG: Avoid where possible, as compression artifacts can distort the edges of the modules.
Pre-Print Checklist: Avoid Costly Mistakes
Before sending a run of 10,000 flyers to the printing press, execute this rigorous testing protocol:
- Print a physical test proof on the exact paper stock you plan to use, utilizing your office printer at 100% scale.
- Test with multiple devices: Scan the printed proof using an older iOS device, an entry-level Android device, and a flagship smartphone.
- Test under various lighting conditions: Scan the code in dim light, under harsh fluorescent office lights, and in direct sunlight to ensure glare does not break the scan.
- Test scanning angles: Try scanning from the side, from above, and from below to simulate how real-world users will interact with your print.
- Verify the destination link: Double-check that the QR code routes to the correct, active URL and that any tracking parameters are capturing data accurately.
Frequently Asked Questions
What is the minimum physical size a QR code can be printed?
The absolute minimum size for a standard QR code is 2 x 2 cm (0.8 x 0.8 inches). However, for dense data or complex designs, a minimum size of 3 x 3 cm (1.2 x 1.2 inches) is highly recommended to ensure universal compatibility across all mobile devices.
Can I print a QR code in color?
Yes, you can print QR codes in color. However, you must maintain a strong contrast between the dark modules and the light background. Avoid pastel colors, yellow, or light grey for the foreground patterns, as camera sensors struggle to register them.
Why does my QR code work on my screen but not when printed?
Screens emit light, making it easier for camera sensors to detect contrast. Paper, however, reflects light. If your print substrate is glossy, it can create glare that blinds the camera. Additionally, ink bleed on paper can distort the fine lines of the QR code, a problem that does not exist on digital screens.
Does the error correction level affect the printing size?
Yes. Higher error correction levels (such as Level H, which recovers up to 30% of lost data) add more modules to the QR code layout. This makes the pattern denser. If you use high error correction, you must print your QR code larger than you would if you used low (Level L) error correction.